(Also known as the Hamley Twist, Nevada Twist, Cowboy Twist, and Arizona Twist)
Do the stirrup leathers of your Western saddle strain your knees? Is the traditional method of a broomstick through the stirrups not cutting it as far as twisting them? Learning how to twist and wrap your stirrup leathers can increase your comfort in the saddle and relieve the stress on your knees. For lack of finding a saddle shop who could do it for me, I decided to try it myself. It ended up costing me less than $20!
I searched the internet for one site with easy to understand visual step-by-step instructions. I didn't exactly find that, though, so I took bits and pieces from what I could find and below is what I ended up doing. I did have an advantage in that I have a Crates saddle I purchased used which has wrapped stirrup leathers (I don't believe it came from Crates that way though), which gave me something to copy!
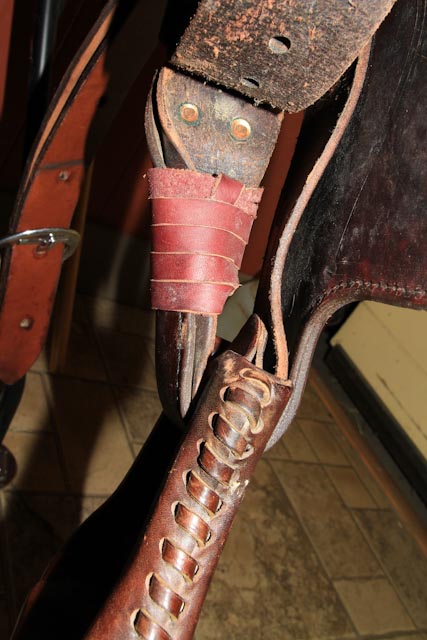
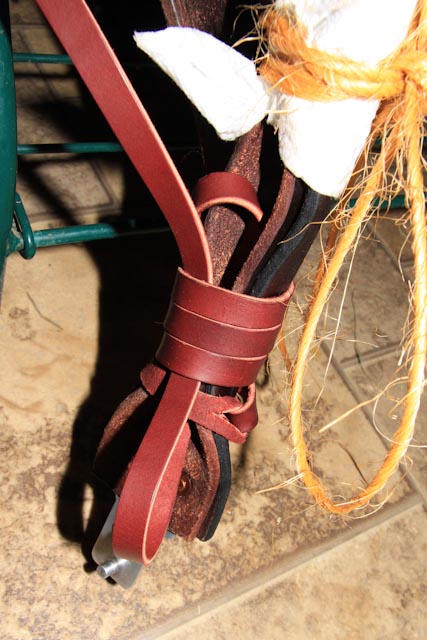
First, a photo of the wrapped stirrup leather on the Crates saddle that I followed as an example.
Do the stirrup leathers of your Western saddle strain your knees? Is the traditional method of a broomstick through the stirrups not cutting it as far as twisting them? Learning how to twist and wrap your stirrup leathers can increase your comfort in the saddle and relieve the stress on your knees. For lack of finding a saddle shop who could do it for me, I decided to try it myself. It ended up costing me less than $20!
I searched the internet for one site with easy to understand visual step-by-step instructions. I didn't exactly find that, though, so I took bits and pieces from what I could find and below is what I ended up doing. I did have an advantage in that I have a Crates saddle I purchased used which has wrapped stirrup leathers (I don't believe it came from Crates that way though), which gave me something to copy!
First, a photo of the wrapped stirrup leather on the Crates saddle that I followed as an example.
Supplies You Will Need:
Step 1: To get ready, put your saddle on a saddle stand. Remove the stirrup hobbles, unbuckle the Blevin Buckles and remove the stirrups. Oil both sides of the length of fender neck and stirrup leathers which will be set and wrapped. Reverse the sliding piece of the Blevins Buckle and turn the piece with the prongs so that it now fastens facing the horse.
- Utility knife
- One piece of 1/2" x 72" latigo (I bought a pack of Weaver saddle strings at Tractor Supply)
- (Optional) Piece of baler twine
- Saddle Oil (I used Hydrophane Darkening Oil since I had it on hand and my saddle is mahogany)
- A bucket and warm water
- Towel
Step 1: To get ready, put your saddle on a saddle stand. Remove the stirrup hobbles, unbuckle the Blevin Buckles and remove the stirrups. Oil both sides of the length of fender neck and stirrup leathers which will be set and wrapped. Reverse the sliding piece of the Blevins Buckle and turn the piece with the prongs so that it now fastens facing the horse.
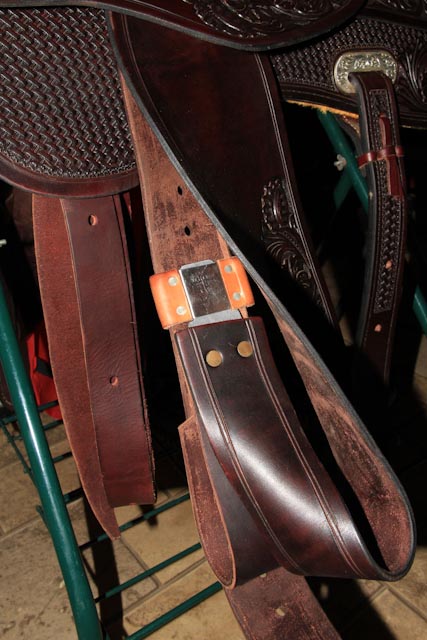
After I oiled the saddle, I left it to sit as pictured for two days (I don't know that it's necessary to let it sit, but that's what I did and the leather was nice and supple when I went to fold it).
Step 2: Take the utility knife and cut a slit near one end of the length of latigo. You want the slit wide enough to feed the other end of the latigo strap through. (If using a 72" length of latigo, you may want to cut it in half so it's easier to work with.)
Step 2: Take the utility knife and cut a slit near one end of the length of latigo. You want the slit wide enough to feed the other end of the latigo strap through. (If using a 72" length of latigo, you may want to cut it in half so it's easier to work with.)

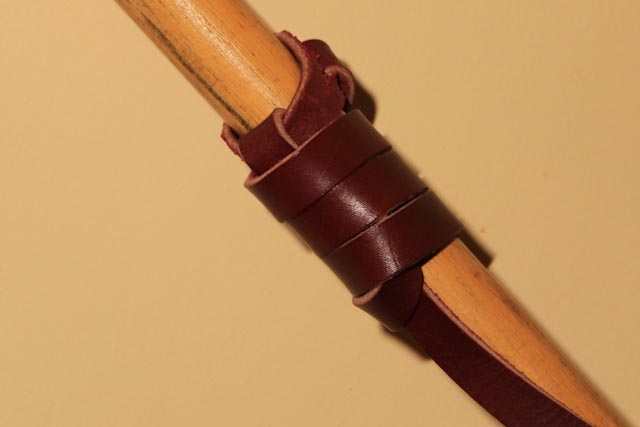
Step 3: Practice the wrap. I practiced wrapping the leather on an old pole.
- To start the wrap, slip the one end of the latigo through the slit you made near the other end (making a loop) and pull strap snug (but not too tight at this point) around the pole, then continue with three more full spiral wraps around the pole.
- Feed the latigo up and beneath the wraps (which will actually be easier on the stirrup leathers because you'll be feeding it up through the hollow of the folded stirrup leather), coming over the top of the first wrap, then feeding it back down underneath the remaining three wraps of strap.
- Snug it up tight to see what your finished wrap will look like. Don't cut the excess the excess leather off though, because this was just practice and you'll want to use the latigo strap for your actual wrapping of the stirrup leathers.
Step 4: Get your bucket with very warm water and soak the length of stirrup leather for 3 or 4 minutes. Remove the leather and and dab it dry with a hand towel.
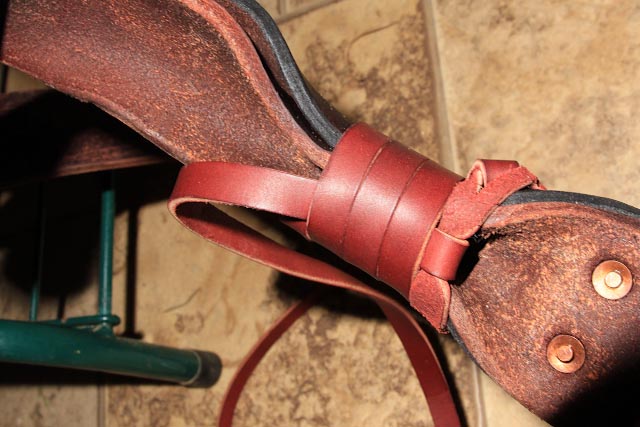
Now you are ready to do the actual wrap! (Note in the photo below, the view of the wrap is upside-down compared to that shown on the practice pole in the above photo.)
Now you are ready to do the actual wrap! (Note in the photo below, the view of the wrap is upside-down compared to that shown on the practice pole in the above photo.)
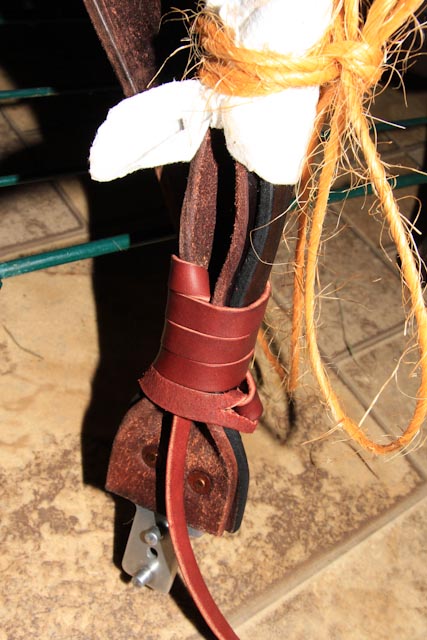
Step 5: Fold the rough sides of the leathers together. Since I didn't have someone around to help hold, I used baler twine to tie my folded leathers. Start wrapping; start by placing the looped end of the latigo closest to the buckle end, same as you practiced, continue with 3 more spirals. Again, at this point, don't wrap too tightly because you will be feeding the one end of the latigo up between the folded leather.
You're almost finished. You may have to loosen the leather wrapping just enough to feed the strap down under the 3 wraps. Don't worry, you'll be able to snug it up and tighten as the last step.
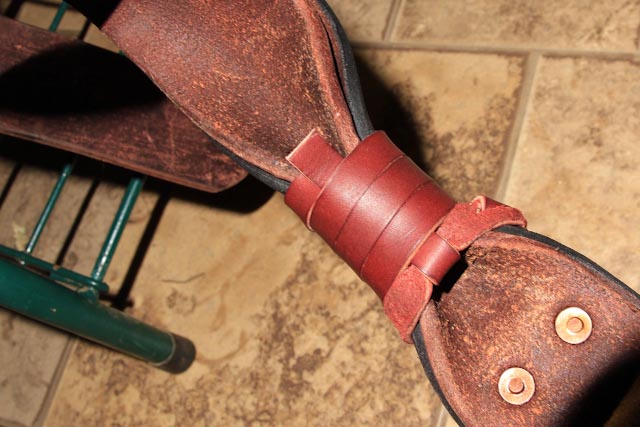
See, pulled tight!
See, pulled tight!
Step 6: Now just cut off the extra length of latigo strap....
put your stirrup back on, fasten the Blevins Buckle in the position so it is now facing the horse, buckle your stirrup hobble....
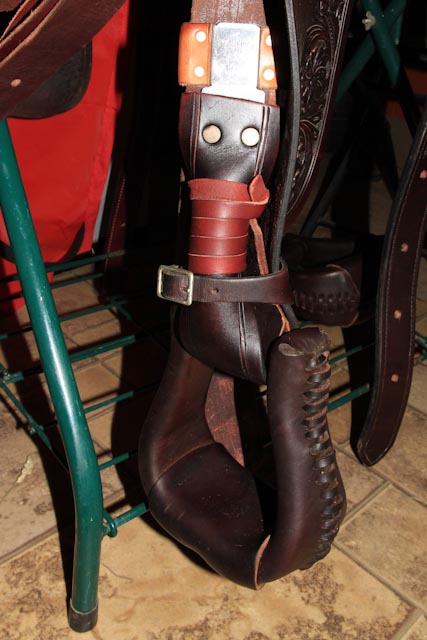
AND you have your finished project.... twisted & wrapped stirrups!

About the Author: Valerie Whalen has owned horses since 1974. She originally published this article on her blog, but was kind enough to allow us to republish it to share with our readers. If you enjoyed this article, please leave a comment letting Valerie know!
 RSS Feed